In the previous article, I have introduced the basic fundamentals of Serverless and its uses cases. This article will help you understand how to build, test, and deploy Serverless functions to the public clouds. Currently, we have a couple of public cloud vendors that provide service to run serverless functions such as Amazon Web Service, Azure, and IBM Bluemix. But in this article, we only focus on AWS one of the largest public cloud providers on the market.
How to build, run and deploy?
When starting designing, and building serverless functions, you might wonder how to deploy your function into the cloud. With AWS, there are some ways we can deploy, test and invoke your function:
- Using the AWS Console Management: We can create a Lambda function, upload code, add triggers, and test your Lambda function manually. You might use this way when first.
- AWS CLI: you also can use AWS Lambda CLI to create, deploy, invoke, manage, monitor your Lambda function. You can use existing commands to deploy and test your Lambda function automatically without a manual process. But this isn’t good for production and large project.
- Using frameworks: deploy can be easier with Serverless, AWS SAM, AWS Amplify, Zappa, Bref (for PHP function), Claudia, etc.
Time to Code
Before getting started, you need an AWS account. If you do not already have an AWS account, you can utilize their free-tier accounts.
Sign in with an AWS IAM user. You should not use the root account unless access to the billing or operations requires root privileges. This user should have IAM permission to create and manage IAM users.
Step 1: Prepare credentials
- Create a Programmatic access IAM user and assign Administrator policy.
For your real project, you should restrict permissions using AWS managed or custom policy instead of Administrator privileges.
- Go to IAM and select the above user you just created and view details; then select the Security credentials tab and create an Access Key. Store and copy your access key and secret key for the next step.
DO NOT share your credentials with anyone you don’t trust.
Step 2: Configure credentials
- Install the latest AWS CLI on your machine, you can follow these instructions.
- Configure an AWS-named profile using this command:
aws configure --profile slsDev. Next, enter the Access Key ID and Secret Key (copied in step #1) and additional properties, then finish configuring the AWS credentials command.
Once you have finished configuring the AWS credentials, you can build, run locally, test, and deploy your Lambda function using your desired Framework. For this article, I will detail two frameworks: Serverless and AWS SAM. We will use Node.js runtime, so be sure to have Node.js ≥ 8 installed on your machine.
Build, test, and deploy a hello world Lambda function using the Serverless framework
Step 1: Install Serverless
npm install serverless -g
sls --version // print the installed version i.e. 1.45.1
At this point, you can configure the serverless credentials, or if you have already done this from our previous steps, you can continue.
If you experience issues installing serverless, you may refer to this guide.
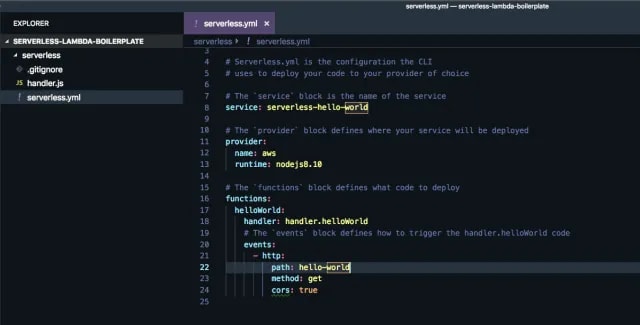
Step 2: Create a hello world project
The command below will create a Serverless project that contains a Hello World function with Node.js runtime.
sls create --template hello-world
code . // open VSCode editor
The following files will be created once the command has been successfully executed.
Step 3: Test your function locally
There are several ways to test your function locally before deploying it into AWS.
a) Test Lambda function locally using Serverless CLI
sls invoke local -f helloWorld
The results of this command are:
{
   "statusCode": 200,
   "headers": {
       "Access-Control-Allow-Origin": "*"
   },
   "body": "{\"message\":\"Go Serverless v1.0! Your function executed successfully!\",\"input\":\"\"}"
}
Refer to this guide for more available options for the invoke command.
b) Run API locally using serverless-offline
The serverless-offline plugin emulates your AWS Lambda function and AWS API Gateway on your machine. It starts an HTTP server that handles the request’s lifecycle, like APIG, and invokes your handlers.
- Install the
serverless-offline plugin
npm install serverless-offline -D
- Update serverless.yml file: add the following lines to the bottom of the serverless.yml file:
plugins:
- serverless-offline
- Then, run the serverless offline command.
sls offline
The results of the command are:
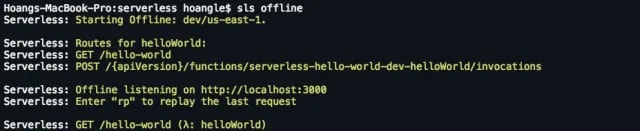
You can send a request to your API running at http://localhost:3000/hello-world (port 3000 default port of the serverless-offline).
Step 4: Deploy your Lambda function to AWS
To deploy your Lambda function to AWS, run the command
sls deploy — state prod
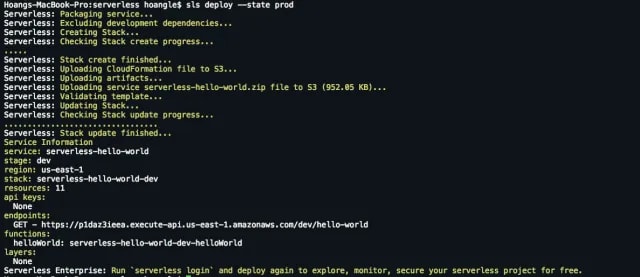
Using the option state, with the above command and serverless, you can deploy multiple states for the same service and deploy multiple environments of your Lambda function such as Dev/Staging/Prod environments.
The output of the deploy command will contain the list of endpoints of your API. Send a request to check the output.
Step 5: Remove your Lambda function
If you don’t want to run your Lambda function anymore, you can remove it automatically out of AWS using this command sls remove — state prod

If you have deployed multiple states, you can remove all states by running the above command for each deployed state.
Build and deploy a hello world Lambda function using the AWS SAM framework
Now that you understand how to build, deploy, invoke/test and remove your Lambda function using Serverless, we will explore doing the same process with AWS SAM – Serverless Application Model; an open-source framework used to build serverless applications on AWS.
Step 1: Install AWS SAM CLI
Follow this article to install the latest version of the AWS SAM CLI on your machine.
Step 2: Create a hello world project
SAM provides a command to initialize the SAM project from a built-in template or Cookiecutter project template on GitHub or the local system. To create a Hello World SAM project, run
sam init -r nodejs10.x -d npm -n sam-hello-world
This command will create a SAM project with Nodejs.10x runtime, using NPM as dependencies management. The SAM hello world project is structured as seen below.
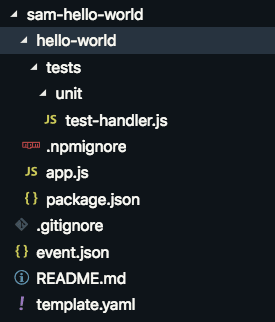
SAM Hello World project structure
As with Serverless, AWS SAM also uses a .yaml file for the service configurations. You can add or remove Lambda functions, as well as add your custom CloudFormation resources to this file.
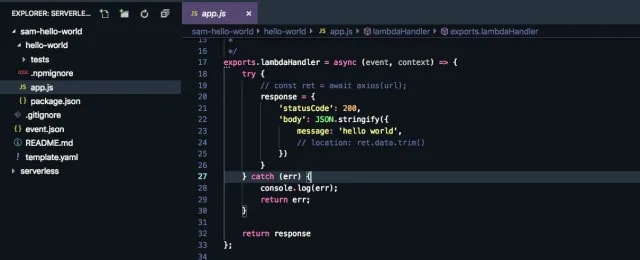
The Lambda handler file for AWS SAM is PROJECT_DIR/[function-name]/app.js. The content of the handler file is completely the same as the Serverless handler file.
Step 3: Test your function locally
- Invoke Locally: You can invoke the AWS SAM Lambda function locally in the same way as the Serverless framework by using this command:
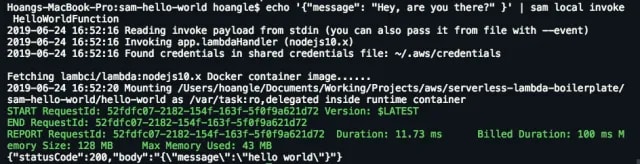
echo '{"message": "Hey, are you there?" }' | sam local invoke HelloWorldFunction
SAM will pull, build, and start a Docker container and then invoke your Lambda function. Below is an example of the results.
Start API: If you are building an API Gateway on AWS that will integrate with your Lambda function, run the command sam local start-api. This will start your API locally and you can send an HTTP request in the same way as the serverless-offline plugin.

Start Lambda locally: if you are building a Lambda that supports other triggers than HTTP, you can start and invoke it locally using:
sam local start-lambda
Then, use AWS SDK to invoke the Lambda function locally as seen below.
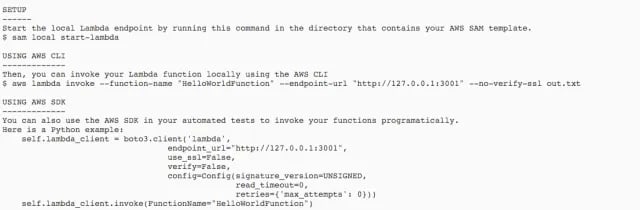
Original Code from AWS
Step 4: Deploy your Lambda function to AWS
To deploy your Lambda function to AWS with SAM CLI, run the following two commands in order.
- Build the SAM package: Before building the package, if you don’t already have an S3 bucket, you will need to create one. To do this, access the AWS Console Management, select S3, and create a bucket in the region you will deploy your Lambda function. Once you have the bucket you can build the SAM package using the command:
sam package --s3-bucket innomizetech-sam-sample-us-east-1 --profile slsDev --region us-east-1 --output-template-file template-export.yml
- Deploy the SAM package: After building the package, you can deploy it into AWS using the command:
sam deploy --template-file template-export.yml --profile slsDev --region us-east-1 --stack-name sam-hello-world --capabilities
    CAPABILITY_IAM
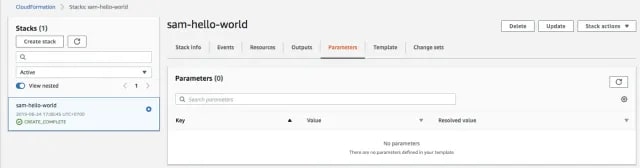
Once the command is executed successfully, go to your AWS Console Management, select us-east-1 region, and you will see a CloudFormation stack has been created and deployed successfully.
Lambda Function
You will also see a Lambda function has been created.

CloudFormation Stack
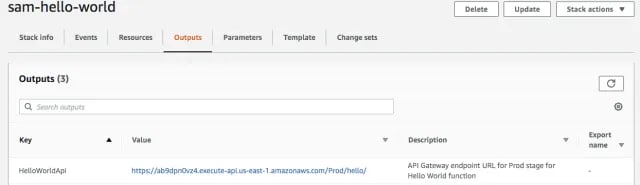
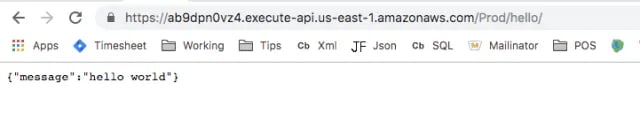
Go to CloudFormation management, select the newly created stack, then select the Outputs tab. You will see the outputs that contain the URL of your API Gateway endpoint that allows you to send the request.
Step 5: Remove your Lambda function
Currently, there is no SAM command available to remove your Lambda resource on AWS. However, you can use CloudFormation CLI to delete your stack. The result of the delete stack command is all associated resources created from the stack will be deleted as well.
aws cloudformation delete-stack --profile slsDev --region us-east-1 --stack-name sam-hello-world
Summary
We have covered the basic flow to build your serverless function, and I introduced two frameworks for building the Serverless function. However, I recommend you also try other frameworks to determine which is appropriate for your project.
Should you run into issues while practicing the steps outlined in this article, I encourage you to reach out to me. You can get in touch with me through my Twitter handle @hoangleitvn